SNS Share Button for Gatsby Blog
This post introduces how to put arranged SNS share buttons for Gatsby blog posts.
Table of contents
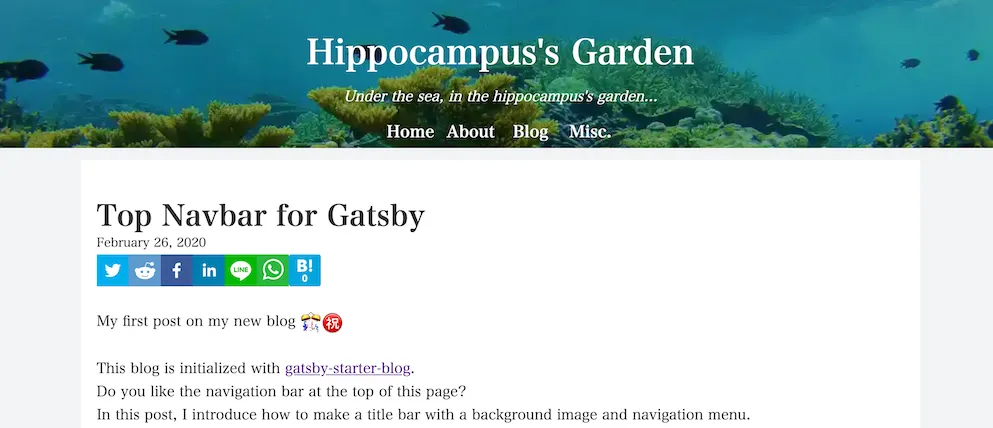
Share buttons are an essential element of blogs in this “SNS era”. In this blog, too, you see them for several SNS at the top and bottom of each post. However, Gatsby blog does not have share buttons by default.
Fortunately, there is an easy-to-use module in React.js. In this post, I demonstrate how it is used in the Gatsby blog.
Install
First, install react-share.
npm install --save react-shareShare Button
I consider the following 6 SNS (plus Hatena Bookmark):
- LINE
react-share supports many other SNS such as Telegram, Tumblr, Weibo etc.
react-share
Let’s create share.js (full code) and import ShareButton and Icon from react-share for each.
import React from 'react';
import { useStaticQuery, graphql } from "gatsby"
import {
    FacebookShareButton,
    FacebookIcon,
    TwitterShareButton,
    TwitterIcon,
    WhatsappShareButton,
    WhatsappIcon,
    LineShareButton,
    LineIcon,
    LinkedinShareButton,
    LinkedinIcon,
    RedditShareButton,
    RedditIcon
  } from 'react-share';

...
Next, get the site metadata such as the page title and URL with GraphQL.
...

const Share = ({title, url}) => {
    const data = useStaticQuery(graphql`
        query ShareQuery {
            site {
                siteMetadata {
                    defaultTitle: title
                    social {
                        twitter
                    }
                }
            }
        }
    `)
    const {social} = data.site.siteMetadata
    title = title + ` | ` + data.site.siteMetadata.defaultTitle

...

}
It’s almost done! The last part returns the unnumbered list of share buttons. In each list item, I set display: "inline-block" to arrange the buttons in a single line.
const Share = ({title, url}) => {

    ...

    return (
        <ul style={{listStyle:"none", margin: "0", padding: "0"}}>
            <li style={{display: "inline-block"}}>
                <TwitterShareButton title={title} via={social.twitter} url={url}>
                    <TwitterIcon size={40} square="true" />
                </TwitterShareButton>
            </li>
            <li style={{display: "inline-block"}}>
                <RedditShareButton title={title} url={url}>
                    <RedditIcon  size={40} square="true" />
                </RedditShareButton>
            </li>
            <li style={{display: "inline-block"}}>
                <FacebookShareButton url={url}>
                    <FacebookIcon size={40} square="true" />
                </FacebookShareButton>
            </li>
            <li style={{display: "inline-block"}}>
                <LinkedinShareButton url={url}>
                    <LinkedinIcon  size={40} square="true" />
                </LinkedinShareButton>
            </li>
            <li style={{display: "inline-block"}}>
                <LineShareButton url={url}>
                    <LineIcon size={40} square="true" />
                </LineShareButton>
            </li>
            <li style={{display: "inline-block"}}>
                <WhatsappShareButton url={url}>
                    <WhatsappIcon size={40} square="true" />
                </WhatsappShareButton>
            </li>
        </ul>
    );
}

export default Share;
Hatena Bookmark
Hatena Bookmark is not supported by react-share, so I use Helmet instead. As I showed earlier, import Helmet from react-helmet first. The button component is taken from here.
...
import { Helmet } from "react-helmet"

...

const Share = ({title, url}) => {

    ...

    return (

        <ul style={{listStyle:"none", margin: "0", padding: "0"}}>
            <Helmet>
                <script type="text/javascript" src="//b.st-hatena.com/js/bookmark_button.js" charset="utf-8" async="async"/>
            </Helmet>

            ...

            <li style={{display: "inline-block"}}>
                <a href="https://b.hatena.ne.jp/entry/" className="hatena-bookmark-button" data-hatena-bookmark-layout="touch-counter" data-hatena-bookmark-height="40" title="このエントリーをはてなブックマークに追加">
                    <img src="https://b.st-hatena.com/images/v4/public/entry-button/[email protected]" alt="このエントリーをはてなブックマークに追加" width="20" height="20" style={{border: "none"}}/>
                </a>
            </li>
        </ul>

    );
}

export default Share;
Blog Post Template
Finally, let’s import the share buttons from the blog post template blog-post.js. The Share component defined above displays the arranged share buttons. I call it twice: at the start and the end of the post.
...

import Share from "../components/share"

...

const BlogPostTemplate = ({ data, pageContext, location }) => {

  ...

  return (
    <Layout location={location} title={siteTitle} toc={post.tableOfContents}>
      <Seo
        title={post.frontmatter.title}
        desc={post.frontmatter.description || post.excerpt}
        banner={post.frontmatter.featuredImage}
        pathname={post.fields.slug}
        article={true}
      />
      <article>
          <h1
            style={{
              marginTop: rhythm(1),
              marginBottom: 0,
            }}
          >
            {post.frontmatter.title}
          </h1>
          <p
            style={{
              ...scale(-1 / 5),
              display: `block`,
              marginBottom: rhythm(0),
            }}
          >
            {post.frontmatter.date}
          </p>

          <Share title={post.frontmatter.title} url={url + post.fields.slug}></Share>
          <section dangerouslySetInnerHTML={{ __html: post.html }} />
          <hr
            style={{
              marginBottom: rhythm(1),
            }}
          />
          <footer>
            <Share title={post.frontmatter.title} url={url + post.fields.slug}></Share>
            <Bio>{content}</Bio>
          </footer>
      </article>
    </Layout>
  )
}

export default BlogPostTemplate

...
Don’t forget to set OGP images 😉